VISUAL GUIDE: Install Pragha on a computer running Linux Mint 17.2
|
10 years ago 0 |

1). Contents:
How to install Pragha on a computer running Linux Mint 17.2 "Rafaela"
---------------------------------------------------------------------------------------------------------------------------------------------------------------
2). Pragha is not available for installation through the normal channels.
Unfortunately Pragha is currently not available for installation on Linux Mint through the normal channels (which are listed below):
- Software Manager (Preferred installation method, especially for BEGINNER LEVEL users).
- Synaptic Package Manager.
- Clicking on the Install button on the http://community.linuxmint.com/software/review/pragha webpage.
As of the 30th Jul 2015, the most practical method for a BEGINNER LEVEL user to get Pragha up and running on Linux Mint, involves the installation of an external PPA onto your computer.
---------------------------------------------------------------------------------------------------------------------------------------------------------------
3). Risks involved in installing external PPA's:
Unfortunately there are additional risks involved in using external PPA's.
If you are new to Linux and are unfamiliar with the risks involved in using third-party PPA's, you might want to read the following articles before you proceed:
I have done my due diligence and decided that I am happy to accept the risks involved in using ppa:ubuntuhandbook1/pragha on my computer. I have had Pragha up and running on my computer for the past couple of months.
If you have done your due diligence and are happy to accept the risks involved, follow the instructions below to install Pragha - Rev 1.3.2.1 (released 22nd Feb 2015).
--------------------------------------------------------------------------------------------------------------------------------------------------------------
4). Install Pragha (Rev 1.3.2.1) using Graphical User Interface (GUI):
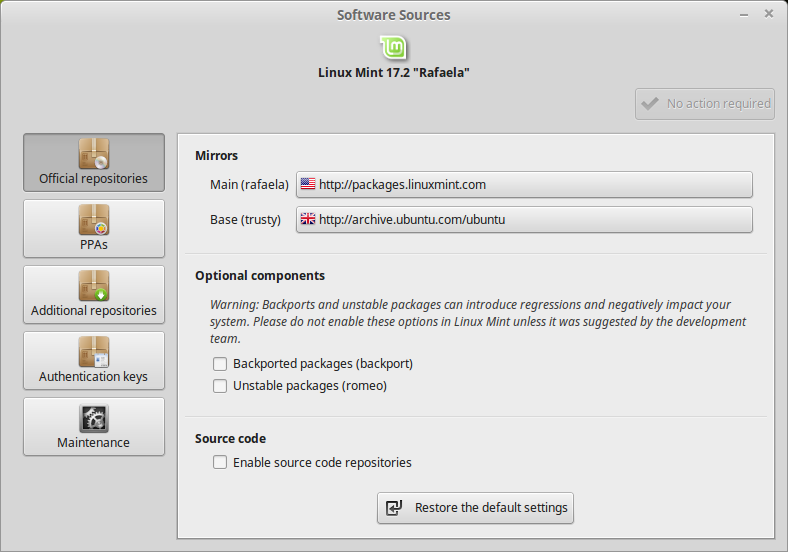
a). Open Software Sources.
- Click on Menu - Administration - Software Sources

b). You will need to enter your Password.

c). The Software Sources window will open up in the Official Repositories on display.
d). Click on the PPA's button to display a list of the PPA's currently installed on your system.
e). The Software Sources window will now display a list of the PPA's currently installed on your system.
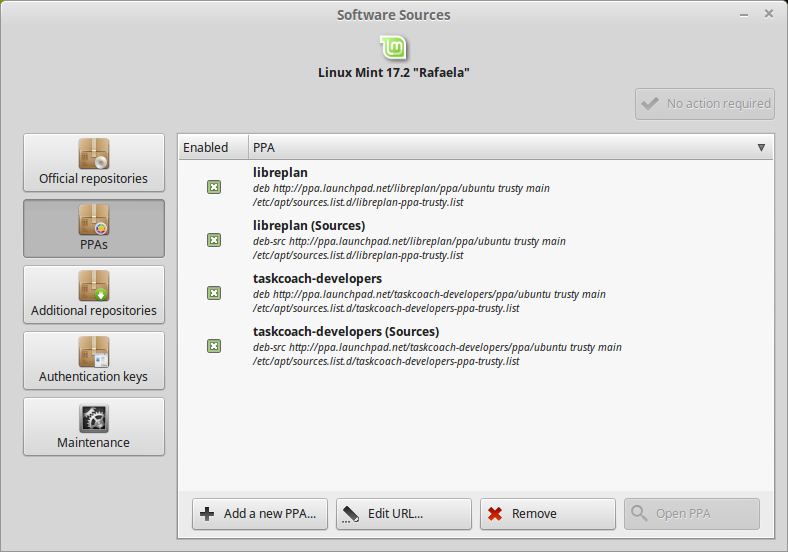
f). Click on the Add a new PPA button.
![]()
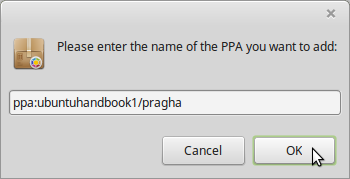
g). A pop-up window opens up asking you to
- Please enter the name of the PPA you want to add
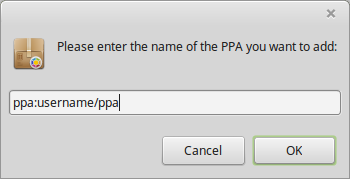
h). Replace the ppa:username/ppa prompt in the data entry box with:
- ppa:ubuntuhandbook1/pragha
i). When you Click on the OK button a pop-up window will open up with information on:
- ppa:ubuntuhandbook1/pragha
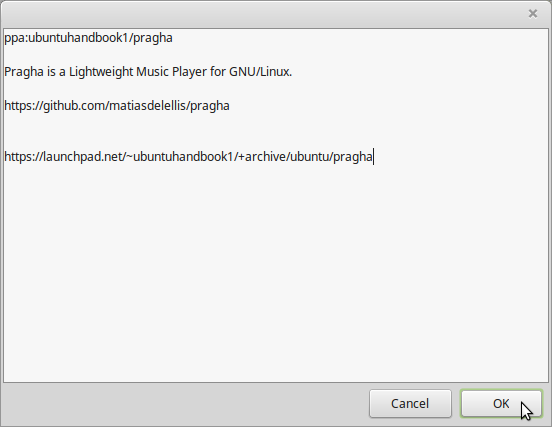
j). Click on the OK button and +/- 20 seconds later the Software Sources PPA's window will refresh itself. with two new PPA entries:
-
ubuntuhandbook1/pragha
- ubuntuhandbook1/pragha (Sources)
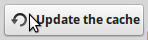
Previously this Software Source PPA's window had a greyed out No action required button.

Now as you can see it sports an Update the cache button.
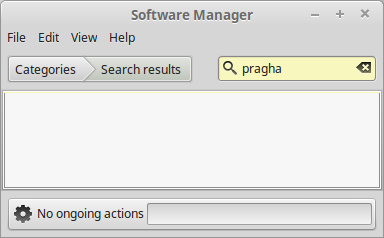
k). If you were to launch Software Manager at this stage (Menu - Administration - Software Manager) and search for Pragha, you would not find any software available to install.
l). Click on the Update the cache button.
A Download Package Information pop-up window will open up
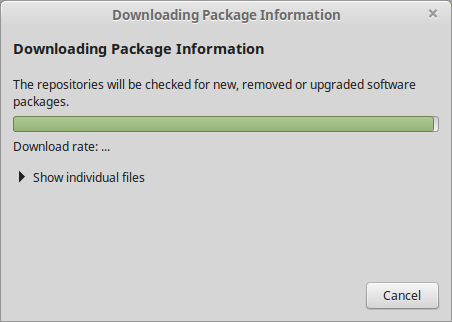
m). After +/- 20 seconds the Software Sources PPA's window will refresh.

You will notice that the Update the cache button is no longer present.
It has been replaced by a grey-ed out No action required button.
The Pragha package should now be available for installation using Download Manager, so it is safe at this point to close the Software Sources window (by clicking on the X in the top right hand corner of the window).
n). Open Software Manager by clicking on:
- Menu - Administration - Software Manager.
o). Type Pragha into the Search box and click Enter on your keyboard.
p). Software Manager displays two search results for Pragha.
Click on the pragha icon.
- Unless you are using an i386 32bit computer in which case you would click on pragha:386 icon.
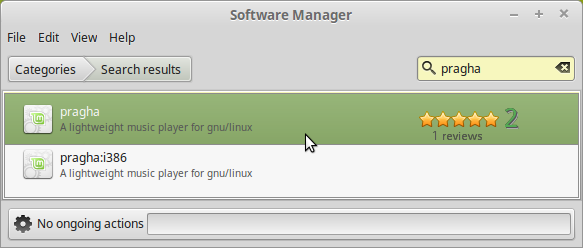
Click on the pragha icon.
- Unless you are using an i386 32bit computer in which case you would click on pragha:386 icon.
q). The Software Manager Pragha window will now open up.
- As you can see Pragha (Rev. 1.3.2.1) is available for installation.
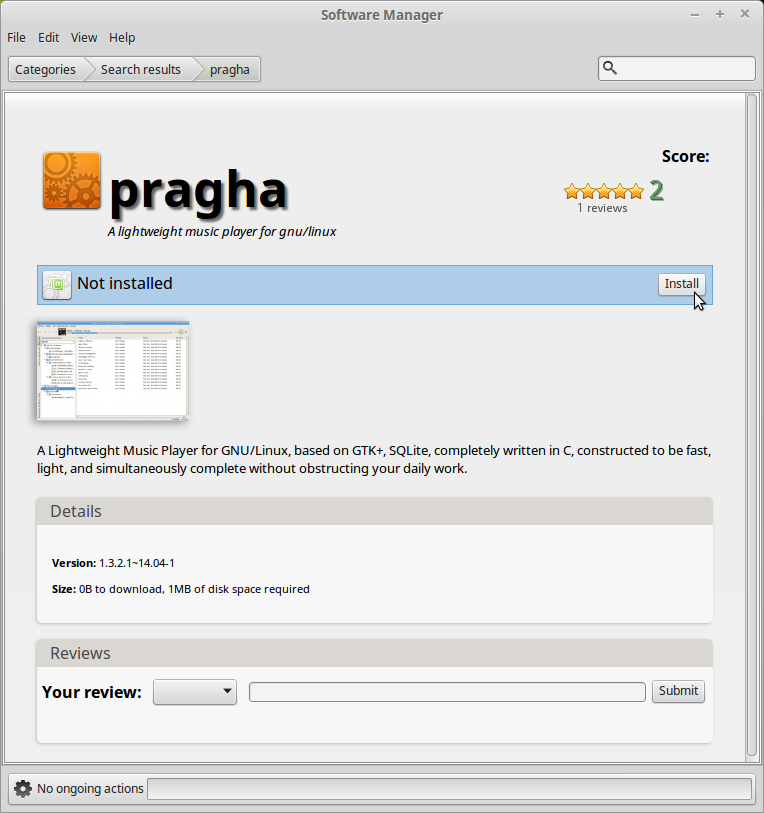
r). When you are ready, click on the Install button
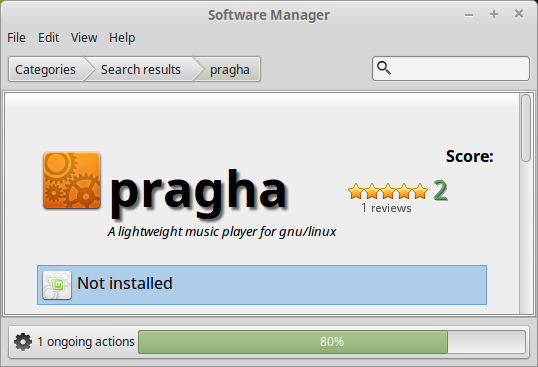
The ongoing actions display at the bottom of the Software Manager window gives you a graphical display of the installation process:
- Note: The screenshot above was taken when the installation was 80% complete.
s). You will know when Pragha has been installed when:
- The Not Installed message change to Installed.
- A green tick appears on the icon next to the Installed message.
- A Remove button appears (should you wish to remove the Pragha package).

--------------------------------------------------------------------------------------------------------------------------------------------------------------
5). Install Pragha (Rev 1.3.2.1) using Command-Line Interface (CLI):
a). Open a Terminal:
- Press Control - Alt - T at the same time
b). Install Pragha:
- ~$ sudo add-apt-repository ppa:ubuntuhandbook1/pragha
- Type in password and press enter as instructed
- ~$ sudo apt-get update
- ~$ sudo apt-get install pragha
c). Remove Pragha:
- ~$ sudo apt-get remove --purge pragha
--------------------------------------------------------------------------------------------------------------------------------------------------------------
6). References:
a). Pragha Music Player Website:
b). Pragha - lightweight music player based on Gtk (author: Shekin)
c). Avoid 10 fatal mistakes in Linux Mint and Ubuntu
d). Official User Guide: Linux Mint 17.2 (Cinnamon Edition)
Comments
Pragha is very good at editing non-Roman script music tags:
Most people use EasyTag to edit their music tags, but Pragha has a feature which in one situation, gives it an advantage over EasyTag.
You can cut and paste words into Pragha when you are editing tags; in EasyTAG you have to type everything in.
EasyTAG is very good when you are typing in plain English, but throw in an acute accent and a simple program like Pragha, which allows you to cut and paste, suddenly looks like a winner.
Typing in Beethoven with EasyTAG is easy but what about 五輪 真弓 (Mayumi Itsuwa), Antonín Dvořák (Dvorak) or Արամ Խաչատրյան (Khachaturian).
------------------------------------------------------------------------------
How to use Pragha to easily edit Music Tags in non-Roman Scripts on a Linux Mint desktop?
So I have ripped my Mayumi Itsuwa CD-ROM. The trouble is all the songs are in Japanese script e.g. リバイバル
i). Right click on the file that you want to edit the tags on (for example a song called リバイバル) and select Open with Pragha from the drop-down menu.
ii). Head across to the Pragha window when it opens up, right click on the song you are interested in (リバイバル by Mayumi Itsuwa) and select Edit track information.
iii). In the Pragha Edit Tags window which opens up, you can see that the title of the song is indeed リバイバル
iv). You know that the song's title in Roman script is Ribaibaru and that the English translation for the song's title is Revival.
v). So edit the song's title in the Pragha Edit Tag window so it reads リバイバル (Ribaibaru - Revival).
vi). Click on the OK button and your tag edits are saved.
There is probably a way to achieve this in EasyTAG but I doubt it is as easy as this Pragha work around.
This one is well written: concise and documented, with due warnings. You should provide a direct link to Pragha though instead of giving a path to click to the player: http://mintguide.org/audio/363-pragha-lightweight-music-player-based-on-gtk.html